Monday, 24 August 2020

How to Choose a New eCommerce Platform Now that Magento 1 is Done

The post How to Choose a New eCommerce Platform Now that Magento 1 is Done appeared first on HostGator Blog.

Is your online store still running on Magento 1? If so, it’s time to move to a new platform as quickly as you can make it happen. 

Why? Magento 1’s official end of life was June 30, after several years of Adobe winding it down and encouraging people to move to Magento 2. 

“End of life” sounds ominous, like something that could cause your site to stop working. And it will—slowly, as code breaks and old extensions fail, or suddenly if hackers exploit an unpatched vulnerability to take over your site (yikes). 

But change is hard, and there are still more than 100,000 web stores on this now-zombified platform, which puts owners and customers at risk of data breaches and card fraud.

Here’s what you need to know about the risks of sticking with Magento 1 and your options for moving your store.

End of life = lots of risk

Even if your Magento 1 online store is still working fine right now, there are four big reasons to replatform it. 

  1. No more Magento 1 support. Adobe issued one last security patch for Magento 1 (which you should install now), and that’s it. The company is taking down its official Magento 1 documentation and no longer handles support tickets for Magento 1.
  2. No more Magento 1 extensions in the Magento Marketplace, or in the repository as of Aug. 6. Bad news if you need to add functionality to your Magento 1 store.

The lack of support and extensions is reason enough to move to a new platform. But the next two issues are urgent, because the security and liability risks to stores on Magento 1 are much higher now.

  1. Magento 1 stores are now out of compliance with PCI-DSS, the global security standard for taking card payments. Unless you’ve invested in third-party tools and new protocols to comply with PCI requirements, you could be liable for fines and investigation costs if there’s a breach. Worst case scenario? Your store could be blocked from accepting card payments.
  2. Magento 1 stores face a huge risk of customer data theft and other cyberattacks. Criminals have been targeting Magento 1-powered sites with formjacking (card-skimming) attacks that steal data as customers enter it. With no more security patches for Magento 1, those stores will be more vulnerable as time goes on and hackers find new ways to break in.

Can I just upgrade to Magento 2?

You can move to Magento 2, but it’s not as simple as a typical upgrade, because Magento 2 is a totally different system. That means that one way or another, you’re going to have to export your store data to a new platform. 

Replatforming is work, but it’s also an opportunity to pick a platform that offers the best combination of features, ease of use and pricing for your business. Here are three options to consider.

Popular eCommerce platform options

1. Magento 2

Small retailers as well as large brands like Albertson’s and Marc Fisher use Magento as their eCommerce platform. Magento 2 is the newest version, available as a free Community Edition and as a more feature-rich (and pricey) Enterprise Edition. 

magento ecommerce website

Magento 1.x users can use Magento’s Migration Guide, which walks you through the steps and resources you’ll need to follow to move your data, extensions and custom code, themes and other customizations to Magento 2. It’s straightforward information, but the process involves lots of steps.

On the fence about whether you can/should handle this yourself? Check out the guide to creating a 7-step migration plan. If that looks like something you can do in-house, you’re all set.

If not, consider hiring a developer, using a tool like LitExtension to automate the migration, or working with Magento for migration support. 

Cost: Magento 2 Community Edition is free. HostGator Magento hosting business plans start at $6/month for the first year. Third-party Magento 2 extension prices vary, with many in the $100-$300 range. LitExtension all-in-one migration services start at $149.

Better for: 

  • Businesses with large or complex stores that want Magento 2 features
  • Businesses with the resources to shore up PCI-DSS and other security requirements while they make and implement a Magento 2 migration plan
  • Businesses with the developer resources to manage the migration
  • Store owners with coding expertise and the time to manage the migration

2. WooCommerce WordPress

WooCommerce is a popular eCommerce platform that runs on WordPress. HostGator’s managed WordPress hosting plans make it easy to keep your site secure and up to date so you can focus on running your shop.

woocommerce website

You can migrate from Magento 1 to WooCommerce a couple of ways. 

  • The DIY method: To move to WooCommerce, you’ll need a WordPress site with the WooCommerce plugin, a theme and your data, imported from Magento as a .CSV file. Follow the detailed migration steps at the WooCommerce blog to move your store. You may also need to point your domain to your new WordPress host. HostGator’s support team can help you if you need a hand.
  • The outsourced method: WooCommerce recommends using Cart2Cart to migrate your store data if you don’t want to handle it yourself. Cart2Cart services start at $29, with lots of a la carte add-ons to tailor the migration to suit your needs. Bonus: Cart2Cart handles everything while your Magento store stays up and running, so you’re not offline while you’re making the switch.

Cost: WooCommerce is free. Most WooCommerce extensions cost less than $100 each. WordPress hosting starts at $6/month for the first year. Cart2Cart migration starts at $29. 

Better for: 

  • Store owners who are comfortable working with WordPress
  • Owners who want a huge menu of themes, extensions and integrations
  • Owners who want to spend less on extensions

3. eCommerce Website Builder 

HostGator’s website builder lets you create a secure eCommerce store with drag-and-drop tools. It works with payment processors including Stripe and PayPal, and Shippo shipping management.

hostgator ecommerce website builder example

To migrate your store from Magento 1, you’ll need HostGator’s website builder’s eCommerce plan and your current product catalog data in .CSV, Excel or Google Sheets format. Once your data’s imported, you can format your pages.

You’ll see an option to connect your existing domain to Gator. If your domain is registered with a service other than HostGator, you’ll also need to point your domain to your Gator hosting plan.

Cost: Gator’s eCommerce plan is less than $10/month for the first year. 

Better for: 

  • Budget-conscious store owners
  • Store owners who don’t want to code or hire someone to code
  • Owners who want to replatform a small store fast

Ready to get started? Get the HostGator eCommerce Website Builder. This post will walk you through setting up your online store, and you can always contact HostGator’s support team for help.

Before you move your Magento 1 store

Whatever new platform you choose, you’ll want to back up your existing site before you migrate, learn how and when to point your domain to your new site, and find out how much downtime—if any—you can expect while you’re moving your site.

By planning ahead, you can make the transition to a safer website easier for you, your employees and your customers.

Find the post on the HostGator Blog


source https://www.hostgator.com/blog/upgrade-magento-new-ecommerce-platform/

Friday, 21 August 2020

6 Best WordPress Plugins for Event Management 

The post 6 Best WordPress Plugins for Event Management  appeared first on HostGator Blog.

Small businesses thrive on hosting events, whether it’s local or online. Events offer these teams a chance to connect with customers and build partnerships with other businesses. 

However, managing and promoting those events can easily turn into a hassle. Thanks to WordPress plugins, you can manage event venues, sell tickets, and track attendance for your events. 

So, make event management easier for your entire team. Try one (or maybe a few) of the WordPress event management plugins below. 

best WordPress hosting

1. Events Manager

Events are complex gatherings requiring a designated team member to juggle every single detail. So, it’s essential for event managers to create a to-do list and make key decisions on when to complete each task. 

The success of your event starts in the planning stage. Set your main event goals to plan your action steps. Jacob Thomas, contributing writer at Bizzabo, writes:

“Knowing how to best prioritize your time and efforts is a common productivity tip. The more focused you can be on the right objectives, the more success you’ll see. This is especially true when planning an event.”

Events Manager gives your team flexibility to easily create events, accept bookings, and manage attendees within one plugin. You can create single or recurring events, offer multiple tickets, and set the specific price. There’s also an option to allow visitors to search your events by location, even if it’s a webinar.

events manager wordpress plugin

2. Modern Events Calendar Lite

Research shows that 96% of small business owners think in-person meetings are worth the investment. Face-to-face meetings are an opportunity to socialize with customers and industry colleagues, especially in relaxed environments. 

For instance, some small businesses host meetups at large conferences for their VIP guests. This social gathering usually includes lots of networking, branded swag, and tasty hors d’oeuvres. It also allows your guests to make more meaningful connections in a smaller crowd.

Plan your upcoming event with Modern Events Calendar Lite, a comprehensive event management plugin for creating a single or recurring event on your website. You can choose several locations for an event, add a countdown view for your attendees, and integrate with Google Calendar.

modern events calendar lite wordpress plugin

Moreover, the plugin is user-friendly for your event-goers. Its integrated online event registration helps your visitors conveniently purchase tickets and sign up for events.

3. WP Event Manager

Event managers act as the glue that holds everything together. They must satisfy the needs of multiple stakeholders while ensuring vendors and attendees are satisfied.

Time management is essential to event planning, so it makes sense to keep others informed of when and how to connect with you. With so many things to do, you’ll want to set clear expectations. Margaret Jones, the managing editor at Eventbrite, offers some sound advice: 

“To orchestrate an event, you have to work with a lot of stakeholders, sponsors, consultants, and talent. Set expectations upfront with each so that there’s a cut-off point for any changes. For instance, make sure you make it clear with vendors that they can’t back out after a certain date.”

WP Event Manager frees up your time by allowing you to create, manage, and categorize events on your website. It comes with a Preview option for you to review event schedules before you hit publish. This plugin also includes search and filtering features to help your visitors find event listings quickly.

wp event manager wordpress plugin

4. Tickera

Brand awareness is a major part of hosting events for your small business. It gives potential customers an inside look at your company, team, and products. 

Research uncovered that following a live event experience, 38% of attendees visit the company’s website, 32% purchase its products or services, and 30% use or wear an item with the brand’s logo on it, such as a T-shirt or pen. You can set similar baseline figures to gauge engagement for your online and offline events. 

Before you earn engagement, you’ll need to sell tickets on your website. Tickera can help you sell and send tickets to your attendees. A third-party isn’t necessary for setup; that way, your small business can control all the event profits. 

tickera wordpress plugin to sell tickets and check in attendees at events

This WordPress plugin also allows you to check-in attendees; you can use the iPhone or Android mobile apps, a Barcode reader, or a Chrome Desktop application. No more long waiting lines for your event-goers.

5. All-in-One Event Calendar

Beyond event planning, execution is key for event management. Everyone on your team needs dedicated time to actually get tasks completed.

“With a clear event plan in place, you need the time and space in your day to actually execute it. At Asana, we have ‘No Meeting Wednesdays’ so everyone can hit their productive stride on important work without getting interrupted by meetings for an entire day,” states Nikki Henderson, marketing content manager at Asana.

With All-in-One Event Calendar, you can get peace of mind managing all your events in a single place. This tool comes with filtering by event category, embedded Google Maps, and multiple view settings.

all-in-one event calendar wordpress plugin

You can customize the calendar appearance to match your website’s theme. Plus, you can embed the event calendar on your WordPress page without creating template files.

6. The Events Calendar

As the event date gets closer, you’ll be checking off your final to-dos. You’ll need another burst of energy to get your team to the finish line. Candice Simons, CEO and founder of Brooklyn Outdoor, offers a few last-minute suggestions: 

“You will realize there is a lot to get done to make everything run smoothly. When you are about two weeks out from the event, you will want to think about meeting with your team, visiting the venue and confirming your guest list to make sure everyone is on the same page.”

The Events Calendar makes it easy to add new details to your event in its admin menu. If you frequently have events at the same venue or web conference link, you can save the event information and duplicate it for future use. In addition, this plugin is responsive for mobile devices.

events calendar wordpress plugin

Plan Your Next Event with the Help of WordPress Event Plugins

Event management involves several moving parts. With these WordPress plugins, you have the flexibility to post events, register attendees, and accept online payments.

Find the post on the HostGator Blog


source https://www.hostgator.com/blog/best-wordpress-plugins-event-management/

Tuesday, 18 August 2020

Marketing Your Online Store’s First Holiday Season: Your How-to Guide

The post Marketing Your Online Store’s First Holiday Season: Your How-to Guide appeared first on HostGator Blog.

Your first holiday season as an online store owner can be a wild ride—and a major planning challenge.

Have you stocked the items shoppers will want? Will your website hold up during the holiday rush? And maybe most important for new store owners, will customers find your store and shop with you during retail’s busiest time of the year?

In this second installment of How to Rock Your Online Store’s First Holiday Season, we’re going to show you how to build a holiday marketing plan you can use to help you find new customers, build awareness of your brand or get more shoppers to your website. 

(Missed the kickoff post in this series? Start with our guide to planning your holiday promotions, then meet back up with us here.)

Ready to take the next step? Here we go.

Plan Your Holiday Promo Marketing Campaigns Now

No matter how early in the year it feels to you, it’s time to get going on your holiday promo marketing campaign plans. Many retailers launch their holiday campaigns in October to catch the eyes of early-bird shoppers. 

Now, some big retailers and analysts expect consumers to begin holiday shopping earlier than normal—so you want to be ready to connect with them when they’re ready to start spending.

For this post, we’re drawing on the wisdom of our web pros Blair Williamson, Emily Hill and Jana Thibodeaux. Their webinar on holiday social marketing is worth watching in full, especially if you have questions after you finish reading this post or want the details on how to create great campaigns.

What is a holiday marketing campaign, anyway?

A holiday marketing campaign is simply a series of marketing messages that support one or more of your business goals for the holiday season. Your goal might be to:

  1. Grow your audience. This is often the most important for new stores, because the bigger your audience, the more potential customers you can reach with each message.
  2. Increase brand awareness. As your audience grows, remind people of what’s awesome and appealing about your store. That might sound vague, but those repeated contacts (aka touchpoints) are the key to earning sales. Google has found that shoppers encounter 20 to more than 300 touchpoints before they make a consumer-goods purchase. 
  3. More click-throughs and conversions. This is the goal most SMB owners think of first when they think of marketing: getting people to visit their site and buy things. 

Marketing campaigns also have a time frame based on what people are buying during a particular time of year. Decide when you’ll launch and when you’ll wrap it up.

And every good holiday marketing campaign has a theme, which is the messaging you want to share with your audience. Yours should be based on the promo plans you worked up for your store after our last post. For example, maybe your store’s big holiday promotion is a gift guide that includes home decor tutorials using your store’s products, and your tagline is Deck Your Halls. 

With your goal (new followers and more sales), your timeline (October through December) and your theme (Deck Your Halls), you’re officially ready to dive into your campaign’s details. 

What marketing channels will you use to promote your holiday campaign?

How do you communicate with your customers? Most eCommerce businesses use a mix of email marketing, blog posts and social media—but some channels typically deliver better results than others. 

Whichever channels get the best responses from your audience are the ones where your campaign should focus. The other channels can act as reinforcements, so your followers there aren’t left out of the loop.

For example, let’s say your home décor store gets the most comments, shares and click-throughs from your Instagram Stories, the next-most engagement from your email newsletters, and less from your Facebook posts. It’s probably best to focus on cool holiday promo content for Instagram and email. Then you can promote your Insta campaign and email newsletter signup on Facebook.

What about paid search ads? Paid search ads can be an effective way to drive traffic to your store. However, during the holiday season you may have to bid higher than you would at other times of the year. If you want to use paid advertising as part of your holiday campaign, check out our guide to budget-savvy keyword bidding. 

What content will you use for your holiday promo campaign?

The good news is that your holiday messaging can be short and still have an impact—especially your social posts and Stories. Each piece of content needs just 3 to 5 elements:

A message—Tell your audience what you’re promoting—your holiday gift guide, product giveaway, buy-one-get-one deals, free shipping or something else they’ll love.

Or, like this pet retailer, you can feature customers who are doing cool things, and use their own words as your promo copy:

holiday marketing example from instagram
holiday marketing instagram post featuring customer story

A hashtag—a unique and memorable phrase for all your holiday promo posts so they’re searchable on the platform.

An image—Canva and other digital editing tools make it easy to combine product photos, holiday design elements and store logos into appealing images for your emails and social posts.

The Chewy posts above are aimed at audience building and brand awareness. If your goal is click-throughs, you need another couple of elements:

A call to action—like Enter Now, Share or Sign Up. 

A link in your call to action—to your product page, landing page, email signup form or something else related to your campaign. Make it trackable so you can see where your traffic comes from. 

As you put together each post or email message, add it to your content calendar so you can see your whole campaign schedule at a glance and stay on track.

How will you deliver your holiday promo content?

Content automation tools are like the elves that make your Santa’s workshop run smoothly.

You can set up your email promotions as a drip campaign, with automated sends based on customer actions. Check out our guide to automated email drip campaigns if you’re not familiar with this handy marketing tool. 

You have lots of options for scheduling social media posts and Stories to publish, including Facebook Content Creator, Buffer and Hootsuite. 

Track your holiday promo campaign performance

You’ve planned, written, proofread, scheduled and double-checked your holiday promo messages. Now there’s one more important step that will make all of this easier next holiday season.

As your campaign runs—and after it ends—you can see how well each piece of promo content performs in your Google Analytics, email marketing program and social media dashboards. The content that does the most to help you reach your goals is the kind you’ll want to do more of in future campaigns. 

Now that you’ve got a plan to reach more customers, raise your store’s profile and/or get more click-throughs to your site, it’s time to think about what people will buy when they get there. Our next rock-the-holidays post will delve into planning holiday exclusives and seasonal product bundles that can spark more sales.

Find the post on the HostGator Blog


source https://www.hostgator.com/blog/ecommerce-holiday-marketing-guide/

Saturday, 15 August 2020

How to promote your small business on Instagram: 10 simple steps

The post How to promote your small business on Instagram: 10 simple steps appeared first on HostGator Blog.

Own a small business and decided to promote it on Instagram? Well, congratulations! You chose the right platform. Don’t worry; you don’t have to be giant brands such as Nike or National Geographic to be successful and generate sales on Instagram. Added bonus? Instagram can help you to boost website traffic.

Using Instagram’s incredible features, you can apply many digital marketing techniques in order to attract Instagram followers for free, which will eventually turn to your potential customers.

In this article, I’m going to walk you through the best Instagram marketing practices for small businesses. I’ll talk about Instagram tips, tricks, and its wide range of free tools that can come handy for small business owners. So, buckle up and read this article carefully.

Why Use Instagram for Small Businesses?

First, I’m going to tell you why you should absolutely have zero doubt about using Instagram for your family-run business or any other type of small business. Instagram gained massive popularity in recent years and is now one of the leading social media platforms. Not only does Instagram help businesses to grow, but also it gave birth to many new companies that run entirely online on the platform.

Here’s a short list of reasons why you should invest your time and energy on Instagram marketing for your small business: 

  • Instagrammers love business pages: about 80% of them follow a business on the platform. 
  • Instagram is a more engaging platform: it has an outstanding median engagement rate of 1.6% (almost 33x higher than a Tweet and 17x higher than a Facebook post).
  • Instagram is free: you don’t have to pay anything to have a business page. Plus, you can access Instagram’s useful insights.
  • Instagram is user-friendly: needless to say, it’s pretty straightforward to use.
  • Instagram is a highly visual platform: perfect for showcasing your products or services.

How to Promote Your Small Business on Instagram in 10 Steps 

Now that you’re convinced how much Instagram can be beneficial for you let’s go over the best promotion actions that you can take to be a winner in this crazy digital world. I’ll break them down into 10 simple steps.  

Step 1- Connect Your Instagram to Your Website and other Social Media

Instagram allows you to add one external link to your bio; so, you have the opportunity to expose your website more to your followers. Actually, social media is one of the best tools that you can use to drive traffic to your website. 


Source: Instagram – Go Get Em Tiger

Another way to use this “link in the bio” feature is to cross-promote all other of your social media. If most of your sales come from other social media or shopping platforms, you can simply add all your social media links to your Instagram bio. 

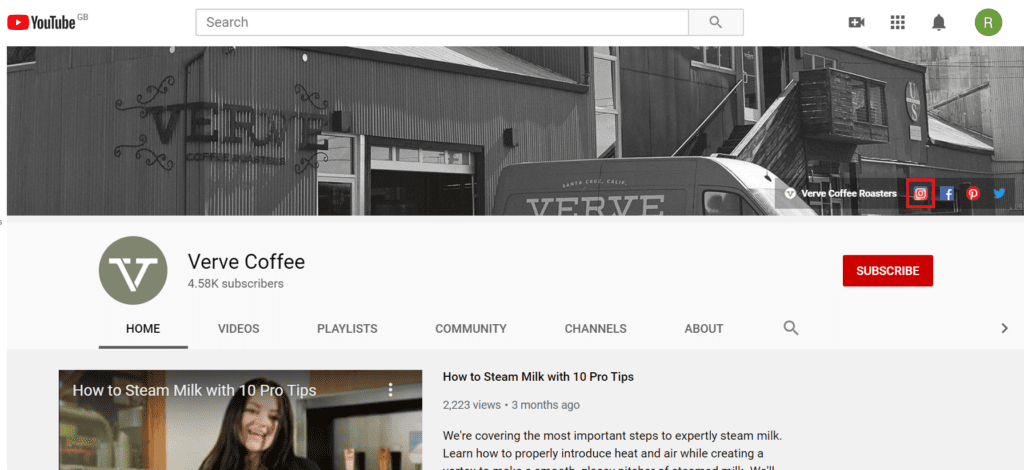
And finally, if you’re doing an excellent job on other social media such as Twitter or Facebook, better to promote your Instagram page on them. These people are already familiar with your business and like to see what your business has to offer. 


Source: Youtube – Verve Coffee

The important thing when cross-promoting on Instagram is paying attention to your content. If you use the same content on all of your social media, how do you expect people to follow you on the new platform?

Although keeping the same style and tone is essential to preserve brand consistency, you need to create different content types for each platform, considering that platform’s atmosphere. 

For example, Twitter users are known to be young, educated, and willing to express their thoughts in a concise, witty way, whereas on Facebook, you can find more senior users. TikTok is filled with teenagers, and Instagram is perfect for those who love watching short videos and images. 

Step 2- Use Instagram Management Apps

Let’s face the ugly truth: running an Instagram page is a full-time job. You can’t expect only to share one photo or video per week and get many followers. You need to continually interact with the Instagram community because the key to success on Instagram can be summarized in one single word: engagement. And the best way to reach this vital quality is by using Instagram manager apps.

Let me explain it further. If you’re already into Instagram, you probably know that the concept of engagement on Instagram has changed drastically over the few years. Those were old days when you could simply use bots or buy followers and likes to gain popularity on the platform. Thanks to the ever-changing Instagram algorithm, the only way to gain real followers and being successful on Instagram is engagement. The more engaged with the community you are, the more your chance of being visible and popular. 

As mentioned earlier, achieving this level of engagement on Instagram requires hours of focused work. As a businessperson, you may not have enough time to deal with promoting your Instagram. One alternative option would be hiring an Instagram manager, which is not exactly a budget-friendly decision. 

A better alternative is to use Instagram apps. Here’s why you should use them:

  • They’re way cheaper than other methods of Instagram marketing.
  • You can save time
  • Using manager apps, your Instagram growth is guaranteed.
  • They come with many other useful features. 

Just be careful about choosing the best Instagram app; not all of them are equally valid. 

Step 3- Optimize Instagram Username, Display Name, and Bio 

As simple as it might sound, just like hashtags, Instagram username, display name, and bio play a crucial role in making you visible for those searching your services on the platform.

Make sure that your username and display name (the name that appears above your bio) includes your business’ main keyword, and your bio contains the secondary ones. What are your main and secondary keywords? Take a look at this restaurant Instagram page:

how to optimize your instagram bio

Source: Instagram –  Nova Restaurant

As you can see, for a restaurant, the main keyword is obviously “restaurant,” which is included in both the username and the display name. Also, This restaurant serves Latin American food (secondary keyword); so, they’ve mentioned that in the bio. 

Optimizing these parts for the Instagram search engine can make a huge difference. So, don’t overlook them. 

Step 4- Consider Instagram Shoppable

You might have your website or other channels of sales that work perfectly for you. But on Instagram, people really love to buy stuff, even as a hobby. That’s why you should consider using the Instagram Shoppable feature. This tool allows your customers to pay for the items right on the app.


Source: Instagram -Boutique du Sorcier

To use this tool, you must have a business account connected to your Facebook catalogs. Also, Your account must be approved for Instagram Shopping. Then do these steps (from Instagram help center):

  1. Go to your profile and tap 
  2. Tap Settings
  3. Tap Business.
  4. Tap Shopping. Note: The option to tap Shopping is only available to accounts that have been approved for Instagram Shopping.
  5. Tap Continue
  6. Select a product catalog to connect to your professional account.
  7. Tap Done.

After a few days, your Instagram shop is ready to use!

Step 5- Make the Most of Instagram Story

Have I mentioned that Instagram engagement is vital for your success on Instagram? A very useful tool on Instagram, which skyrises your engagement is Instagram Story. There are so many reasons why you should use Instagram Story for your business. This part of the app gives you numerous opportunities to be creative. 

Feel free to try all the amazing filters and stickers to entertain your followers. Poll, quiz, emoji slider, and the countdown (a great way of accounting for upcoming products) are only some of the few features of Instagram Story.  


Source: Instagram – Allpress Espresso and Grind

Step 6- Use User-generated Content (UGC)

Using user-generated content is a fantastic way to gain your customer’s trust, along with their engagement. Don’t forget that although they might have a small audience, UGC works like a free advertisement for your business. When other followers see real and authentic content, it provides them a more tangible experience. Think about it; why would anyone advertise a product or service for free unless he or she absolutely loves it?


Source: Instagram – Chinatown Ice Cream Factory

Even major brands such as Coca Cola and Starbucks use UGC to enhance their engagement level on Instagram. 


Source: Instagram – Starbucks

Step 7- Run an Influencer Campaign

Another great way to increase your visibility on Instagram is by running an Influencer campaign. No matter what your business is about, you can find perfect influencers to promote your page. Your budget might not allow you to work with macro-influencers (those who have 100K to 1M followers), but micro-influencers are better options.

Source: Giphy

Believe it or not, it’s better to partner up with Instagram micro-influencers as they produce more engagement compared to the more prominent names. As you run a small-sized business, it’s a good idea to contact a local influencer, especially if you have a store or office in the town. 


Source: Instagram – Star Stranded

Step 8- Keep Eyes on The Competition

Unless your business is incredibly rare, you always have a handful of competitors on Instagram. Try to track and monitor at least your best five competitors on Instagram to see how they manage their accounts. Seek out for their weakness and learn from their mistakes to avoid them in the future. Also, get inspired by their best posts and try to create your own ideas based on them.

I’m not saying that you should copy the ideas, captions, or photos; that would be wrong and useless. What you should do is learn from them, as they are the best in your niche and then customize those ideas for your own business. 

Step 9- Instagram Contests and Giveaways

People love getting free stuff. Who doesn’t? Well, you can get advantages of this spirit to promote your business on Instagram. Running an Instagram contest or giveaway is not a difficult task to do. Just define some simple rules such as “Like and share this post” or “Tag three of your friends to win” to persuade your followers to participate. 


Source: Instagram – Spooksieboo

You can use one of your products or services (or a considerable discount) as a reward.  

10- Use Instagram Ads

The last item on the list is not a free tool; however, it definitely worth trying. Instagram ads can make a sharp difference if you correctly apply them. The good thing about Instagram apps is that you can start with negligible amounts of money and see how they go. It pretty much works like Facebook ads, but make sure you know all things about Instagram ads for your business before launching a campaign.  

Final Words

Just because your business is small does not mean your audience should be small too. Take the necessary steps that I’ve mentioned to build a whole new digital customer level on Instagram.

Find the post on the HostGator Blog


source https://www.hostgator.com/blog/how-to-promote-your-small-business-on-instagram-10-simple-steps/

Friday, 14 August 2020

How To Make A Website Mobile Friendly

The post How To Make A Website Mobile Friendly appeared first on HostGator Blog.

Smartphones quickly went from expensive, exciting new technology, to a regular part of everyday life. Today we find it strange for anyone to leave the house without their phone. From hospital waiting rooms to theater lobbies (back when they were open anyways), people staring at their phones is a normal sight. 

For website owners, that means it’s past time for your website to provide a good mobile experience. 

In 2016 for the first time, mobile internet usage surpassed computer usage. And the trend has only increased in the years since. Over half of all website traffic worldwide now happens on smartphones.

mobile internet usage surpassed desktop in 2016

While the distribution of website traffic for individual websites will vary, approximately half of all your visitors are likely to be viewing your website on the small screen of a phone. Having a mobile-friendly website is no longer optional. If your mobile visitors don’t have a good experience on your site, you’ll drive away a huge portion of your traffic (and hurt your search engine rankings in the process).

You’ve heard it before by now, but we’re saying it again: your website needs to be mobile friendly. 

Is My Website Already Mobile Friendly?

If your website was built or updated within the last few years, the designer or website builder you used may have had the mobile experience top of mind. Before you put a lot of resources into worrying about how to make your website mobile friendly, check to see how your website fares now.

Google provides a mobile-friendly testing tool. Drop your URL into the search box. You’ll not only get a quick answer on whether or not your website is mobile friendly, but also a screenshot of how the page looks on a smartphone screen and a list of recommendations to make the mobile experience better. 

google mobile friendly website testing tool

If the tool shows that your website needs a lot of work, then making your website mobile friendly should be treated as a top priority. Doing so will improve your website’s visibility in the search engines, ensure more of your visitors stick around, and help you increase conversions on your website.

If Google’s tool gives you the thumbs up, updating your website for mobile doesn’t need to be given the same level of priority. But you may still benefit from considering ways to make the mobile experience better for your users. Every little bit helps. 

12 Steps to Make Your Website Mobile-Friendly

Here are a few steps you can take now to make sure your website works as well for your mobile visitors as it does for your desktop users.

1. Make Your Website Responsive.

Most web design experts agree that building a responsive website is the best way to create a site that works well on both desktop and mobile platforms. That’s because a responsive website includes all the same content and information on any device you access it on, but the site responds to the device it’s being displayed on and optimizes its appearance accordingly. 

In other words, the way a page is displayed and arranged changes based on the size of the device screen. An image that shows up next to a block of text on a desktop may show up on top of it when loaded on a smartphone, for instance.  

With responsive design, you can make your website mobile friendly without limiting the information your mobile visitors can access – they still get all the same content the rest of your visitors do. And responsive design is also good for SEO. Google directly recommends it.  

You may think you can’t build a responsive website on your own. But, as responsive design has become the norm, many tools now make it easy. Check out these 20 top web design tools for responsive web design.

Or go with the easiest option of all and use a website builder that offers responsive templates. All design templates in HostGator’s drag-and-drop website builder are already optimized for mobile. You don’t have to do anything special to make sure your website will work on a mobile device. Just select your template and you’re good to go. 

2. Make Information People Look for Easier to Find.

People often pull out their smartphones looking for something specific—the answer to a question, the address of a nearby restaurant, or a customer service phone number. In these cases, they want to find the information they need as fast and as easily as possible. 

Think about what information your mobile visitors are most likely to be looking for when they head to your website, and put that somewhere obvious and easy to find on the mobile homepage. Also consider the FAQs people most often look for when they visit your website. It might not make sense to put all the answers front and center on your mobile homepage, but make sure they’re easy to find and navigate to on a mobile device.

If you’re not sure what your mobile visitors are looking for when they come to your site, use your analytics. In Google Analytics, you can add Mobile Traffic as a Segment in the Behavior section, allowing you to see how mobile visitors interact with your website. 

how to view mobile website traffic in google analytics

If you run a restaurant website and mobile visitors regularly perform a search for your menu, redesign your site to make it easier to find. If your visitors frequently visit the page with your contact information, maybe add that to the bottom of your home page. Reducing the steps they have to take to find the information they’re looking for will make their overall experience on your website better.

3. Ditch Text-Blocking Ads and Pop-ups.

Nobody likes them in any context, but when you’re trying to read text on a small screen and a big ad or pop-up blocks your view of the page, it’s extra annoying.

Most of your visitors won’t take the time to try and find the little X to minimize the pop up, they’ll just click away and go find another website. If you want to create a positive user experience, avoid allowing ads or pop-ups that block the content of a page at all. 

If you feel they’re too important to ditch entirely, then at least either disable them for mobile users, or set it up so a pop-up only appears when they’ve scrolled to the bottom of the page, not when they’ve just landed on it. And make sure the X to cancel out the ad or pop-up is big enough that they can easily find and select it. 

4. Make Website Speed a Priority.

Maybe you remember the days of dial-up and having to wait impatiently for websites to load slowly. But now that everyone takes faster internet speeds for granted, if your website loads at the pace of the not-so-good old days, your audience won’t wait around. 

Google’s research on mobile loading speeds found that most websites take over five seconds to fully load, but few visitors will wait that long before clicking away.

google industry benchmarks for mobile page speed

Website owners can deploy a number of tactics to improve site speed. Some top steps you can take to improve your speed on mobile are:

  • Use AMP (Accelerated Mobile Pages) – AMP is a framework Google encourages for speeding up load times for your web pages on mobile. If you have a WordPress website, you can get started with the AMP plugin. 
  • Compress your images and CSS – The parts of a web page that load the slowest are those that are large and take up a lot of space, such as your high-resolution images and CSS. You can speed up website load time by compressing your image file sizes, so they load faster without negatively affecting the quality of what people see on the site.
  • Check your web hosting plan – If your website has outgrown the web hosting plan you started with, or if you went with a less than reputable hosting provider to start, one negative consequence could be slower load times. You can speed things up by upgrading to a web hosting plan that matches your current needs.

5. Keep Your Web Design Simple.

Complicated websites with a lot of clutter are confusing on any screen, but they make it especially hard for visitors to navigate your site on a small screen.

Avoid clutter. Stick to a clean, minimalist design that makes it easy for people to find what they’re looking for. And by having fewer files on each page that need to load, a simple design will also contribute to faster load times. 

Apply this thinking to your menu as well. If your website has a lot of pages and categories, it may make sense to offer a large menu on desktop screens. But on mobile, you want to cut it down to the most important options. Some websites switch to putting their menu behind a hamburger button on mobile. That way it’s not taking up much space on the mobile screen, but visitors can click to open it if they need it. 

6. Make Your Button Sizes Large Enough to Work on Mobile.

It’s easy enough to click on a button of any size with a mouse, but when you’re trying to “click” with your fingers on a small smartphone screen, small buttons are hard to deal with. And that’s especially true if there are multiple small buttons close to each other—pressing one when trying to select another will cause real annoyance for your visitors.

The best way to save your visitors from this frustration is to use bigger buttons. And be thoughtful about where on the screen you place them. UX expert Josh Clark writes, “While a thumb can sweep most of the screen on all but the most oversized phones, only a third of the screen is truly effortless territory: at the bottom, on the side opposite the thumb.” 

Any time you add a button to your site (and for all those already there), take some time to test them out yourself on however many mobile devices you can scrounge up amongst your employees and family. Make sure selecting each button is reasonably easy on all the devices and, if it’s not, update it so that it is.

7. Use Large Font Sizes.

Reading on a small screen is that much harder if the font is tiny. It’s best to use a font size of at least 14px on your webpages, but go ahead and test out how that looks to see if going bigger could be better here.

It’s also best to stick with standard fonts. Any font your visitor’s browser might need to download will slow down how long it takes your website to load, which is bad news on mobile.

8. Don’t Use Flash.

Using flash throughout your website is an SEO mistake. It can slow down a page’s load time and there are a lot of browsers and devices where it just doesn’t work at all. Neither Android nor iOS devices support flash, so if you build a website that depends in any way on the experience of a flash animation, your mobile users will be left out. 

Most designers know by now not to use flash on a website, but if yours was built a few years ago, you may still have some lingering features that use the outdated technology. Scrap the technology altogether on your website and find a strong web design that works without it.

9. Include the Viewport Meta Tag.

The viewport meta tag is an easy way to control how your website shows up on mobile. If your page opens up as the same width on the small screen of your phone as it does on your desktop, you’ll have to awkwardly scroll from side to side to read each line of text and see the different sides of the page. The viewport meta tag tells browsers to fit the width of your page to the screen of the device type the visitor is coming from.

Adding this to your html is pretty simple. Just paste this onto the html for each page:

<meta name=”viewport” content=”width=device-width, initial-scale=1″>

10. Turn Off Autocorrect for Forms.

We all deal with the small annoyances of autocorrect all the time but even so, website owners often fail to think about the little ways autocorrect can make a user’s interaction with your website inconvenient. 

If you have forms on your website that ask for name or address information, one small way to make providing that information easier on your mobile visitors is to turn off autocorrect for each form field, otherwise their phone will try changing their name or street name to more common words and slow down the process of filling out your form.

In the input field, make sure you include autocorrect=off in the html.

And if you haven’t already, make sure your forms are short. Don’t require visitors to provide more information than necessary. No matter what device they’re on, if the form takes too long to fill out or demands details a visitor doesn’t want to share, they won’t bother. 

11. Allow a Way to Switch to Desktop View.

Some of your mobile visitors may actually prefer to see the desktop version of your website instead of the mobile one (especially if you go with a mobile version of your website rather than a responsive site).

Give them a way to do that if it’s their preference. You want your visitors to be able to interact with your website in the way that makes the most sense for them.

12. Regularly Perform Mobile Testing.

The best thing you can do to make sure your website offers a good mobile experience is to regularly test it out yourself on your mobile device. Every so often, pull up your website on your phone and tablet and spend some time browsing to see if anything’s hard to see or difficult to do. Ask your employees to do the same, and consider hiring users to do testing as well (since they’ll be seeing it all with fresh eyes).

Regular testing is the best way to catch small issues that create a worse experience for your visitors. The faster you notice them, the sooner you can update your website to provide a truly mobile-friendly experience. 

Make Your Website Mobile Friendly

Even if you get everything right today, the way mobile devices look and work will continually change and today’s mobile-friendly website may not still do the job tomorrow. Keep testing, keep tweaking where needed, and continue to think about your mobile users as a priority and you should be fine.

Find the post on the HostGator Blog


source https://www.hostgator.com/blog/how-make-website-mobile-friendly/

Wednesday, 12 August 2020

5 Best WordPress Security Plugins

The post 5 Best WordPress Security Plugins appeared first on HostGator Blog.

WordPress is the most popular content management system in the world. That popularity also makes it a top choice for hackers.

At its core, WordPress is incredibly secure. But the massive ecosystem of plugins and themes makes it vulnerable to security issues.

To protect your WordPress website against these security risks, it’s always a good idea to use a WordPress security plugin. Below we look at five of the best WordPress security plugins for you to install today. 

Why You Need a WordPress Security Plugin

WordPress has solid security measures in place, but if you’re looking to take that security even further, you’ll want to utilize a security plugin. You’ll get access to additional features that WordPress doesn’t have right out of the box, including:

  • Site, file, and malware scanning
  • Protection from brute force attacks
  • Regular security scans, monitoring, notifications
  • Site firewalls

Sure, you can get by without having these in place, but why would you risk it? Sadly, a lot of site owners don’t think about security for their WordPress website until it’s too late.

Once your WordPress site has been compromised, there’s not a lot you can do besides notify your visitors and clean up the mess. If only there was something you could’ve done to prevent this. There is!

The good news is you can implement preventative measures. It all starts with using a WordPress security plugin.

The Best WordPress Security Plugins

For anything related to WordPress, you’ll find dozens of popular plugins to install. Going through every plugin yourself can be tedious. To save you time, we created this list.

Below you’ll find five of the top WordPress security plugins to protect your site against security vulnerabilities.

1. All In One WP Security & Firewall

All In One WP Security & Firewall

All In One WP Security & Firewall is one of the most popular WordPress security plugins. You can configure this plugin pretty easily, even if you don’t have any tech skills.

It’s equipped with a unique dashboard for you to monitor which areas of your WordPress site are protected and which areas need improvement. Its security and firewall rules allow you to progressively add security measures without breaking your site’s functionality.

The plugin protects your site against brute force login attacks, secures your user accounts, adds Google reCaptcha, and even allows you to blacklist specific IP addresses. Plus, the built-in security scanner alerts you if any files have changed in your WordPress database.

All In One WP Security & Firewall is a completely free plugin for you to download here.

2. iThemes Security

ithemes security

iThemes Security is a feature-packed WordPress security plugin. It helps repair common WordPress vulnerabilities, stop automated attacks, and strengthen user credentials.

In just a few seconds, this plugin scans your site, reports vulnerabilities, and then fixes them. It bans troublesome user agents and bots, while also enforcing strong passwords for all accounts. You’ll get email notifications when someone gets locked out after too many failed login attempts.

With the Pro version of this security plugin, you get access to two-factor authentication, malware scan scheduling, and password expiration. The temporary privilege escalation feature is convenient when you need to give a contractor temporary admin access to your site because the password will automatically reset itself. You get dedicated professional support, too.

Test drive the free version, or upgrade to the Pro version here.

3. Wordfence Security

wordfence security

Wordfence Security excels at protecting your site from brute force attacks, offering real-time security monitoring, and blocking malware requests. The malware scanner checks your core files, themes, and plugins for bad URLs, backdoors, SEO spam, and malicious redirects.

This plugin also compares your core files to the WordPress.org repository, checks their integrity, and reports any changes to you. You can get detailed security findings without leaving your dashboard.

With its Live Traffic feature, you can monitor visits and hack attempts in real-time. You can even block attackers based on advanced rules, like IP range, hostname, and referrer.

Download the free version, or you can purchase the premium version.  

4. Sucuri Security

sucuri security wordpress plugin

Created by a team of WordPress security experts, the Sucuri Security plugin offers security activity auditing to ensure hackers can’t steal your sensitive data.

Once installed, it will automatically scan your website for any infected files or known security weaknesses. You then have the option to restore or repair your site.

This plugin also includes regular website monitoring and malware scanning. Plus, if your site is ever compromised, the tool will walk you through three post-hack security actions to get your site back up and running. 

Get this plugin for free here, or try the premium version with virtual patching and advanced DDoS mitigation.

5. SecuPress

secupress

SecuPress is a GDPR-compliant plugin that protects your WordPress site with malware scans, firewalls, and security alerts. Its intuitive interface makes it incredibly easy to set up.

The built-in security scanner detects any issues and then sends a detailed report to your inbox, outlining your next action steps. This WordPress security plugin also comes with seven anti-disclose security modules to ensure your sensitive data is not accessible to hackers.

The Pro version offers additional features like anti-spam protection, automated website backups, and automated website scans.

You can download the free version here, or install the Pro version.

Secure Your WordPress Website

Website security is complex. It’s continually evolving, and what kept your site secure a year ago probably won’t do the trick today.

Instead of trying to understand every security threat, the best course of action is to install one of the expert-level security plugins mentioned above. If you have a smaller site and don’t get a ton of traffic, then you can probably get away with a free WordPress security plugin. But, as your site grows, it’s probably a good idea to upgrade to a paid option and look into implementing a website security checker.

You also can improve the security of your site without having to lift a finger. Upgrade to our managed WordPress hosting now, and our WordPress experts will monitor your site for threats and take care of security for you. So, you never have to worry. 

With your site’s security taken care of, you can focus on more important things, like running your online business and growing your traffic.

Find the post on the HostGator Blog


source https://www.hostgator.com/blog/best-wordpress-security-plugins/

Importance of Websites for Restaurants

The post Importance of Websites for Restaurants appeared first on HostGator Blog.

When you’re tired of cooking yourself and ready to get food that’s been prepared by somebody else, what’s your first move? You turn to the internet. 

Whether that’s to head to the website of a restaurant you know you like, or to do some searches to find a new one to try, most people start the process of getting a meal from a restaurant online.

That was often true before COVID-19, but today pulling up a restaurant website to peruse the menu, check for takeout and delivery options, and place orders is an even bigger part of the typical process of “eating out.” 

If you don’t have a website for your restaurant, trust that many of your potential customers will end up looking for an eatery that does. 

10 Reasons Websites for Restaurants Are Important

A website is a restaurant’s main home online. It’s the place customers that already know you will check first when they want information about you. And it’s the main way new customers looking for options when they’re hungry will learn about you. 

Having a restaurant website provides a number of undeniable benefits. 

1. A website shows legitimacy.

For any type of business, many consumers see a website as a clear sign the business is established and trustworthy. Not having one can make you seem amateur or sketchy by contrast. A restaurant website that looks professional and provides accurate information demonstrates to potential customers that you’re running a reputable business. 

And when it comes to food—where the stakes of eating bad food are high (food poisoning is no joke)—showing your audience you take running your restaurant seriously is important. 

2. A website makes your restaurant easier to find.

When someone wakes up hungry and types “breakfast taco near me” into their phone or laptop, they’re only going to see results that have an online presence. 

google search for breakfast tacos near me shows restaurant websites

While a website isn’t technically required to show up in a Google search—a Google business listing is enough—having a website still plays a big role in how easily customers are able to find you online.

In deciding which businesses and websites should show up on page one in a search, your website authority is one of the things Google’s algorithms take into account. If you don’t have a website for your restaurant at all, you don’t have a way to build authority, which means you’ll show up less often in relevant searches. And the times you do show up, when people see there’s no website link in your Google listing, they may skip to an option that does have a site that makes it easy for them to learn more about the business and food they serve. 

And since people who like your food don’t have anything to link to when recommending you, you’ll miss out on online promotional opportunities. 

Say a local food blogger loves your breakfast tacos. If they’re able to link back to your website in a review, it both increases your website authority and gives their readers an easy way to check out your restaurant. Without that link, readers don’t have a clear, authoritative place to learn about your restaurant and are less likely to follow through and give you a try. 

3. People can browse your menu.

Before committing to a specific restaurant, people want to know what they’re getting in for. What specific food options do you bring to the table? When your menu is right there online, you make it easy for potential customers to review their options and decide what looks good. 

Making your menu available online is useful for everyone, but becomes especially important for any potential customers that have food allergies or are picky eaters. For example, someone who can’t eat gluten needs to know before they show up to your restaurant whether there’s anything on the menu they can actually eat. 

If your menu isn’t available for them to look over in advance, you risk having to deal with unhappy customers that show up hungry and can’t eat (or don’t want) anything you have to offer. And you increase the likelihood that people you could feed don’t show up at all, because they can’t confirm your restaurant has anything they’d want. 

restaurant website with menu

Pro tip: Whatever format you load your menu in, make sure it works well on mobile! A lot of people make decisions about where to eat while on the go. They want to see what’s nearby when they’re hungry on their way home from work or finishing up errands. For these customers, being able to see what their menu options are on their phones can be a deciding factor in their decision about whether to order with you, or go with another area restaurant.

4. You can load mouth-watering images of your food.

Food appeals to more of our senses than just taste. While you can’t use your website to get people’s taste buds watering via the yummy smells of your cooking, you can show them how delectable your dishes look. Take advantage of the visual medium of websites to show off your tastiest looking entrees and appetizers. 

Food that sounds good can become downright irresistible once people can get a glimpse of how it looks. Plus original images of your food are a good way to make a website experience stronger. They make the brand experience people get from your website more memorable, and give you more places to optimize your website for search engines.

restaurant website with original food photography

5. Online ordering is now expected.

Now that most of your consumer base is sheltering in place, the main way people are frequenting restaurants is through online orders. If you don’t have a website, you aren’t giving housebound customers a way to order from you. 

The best way to keep up business for the course of the pandemic is to make sure people have easy options to place takeout and delivery orders through your website.

restaurant website with online order options

Getting that set up now means that you can reap the benefits of the additional income stream online ordering provides once the danger passes. Creating your own system of taking online orders through a website can also save you from a dependency on third-party delivery services that often take too much off the top for restaurants to make any profit—especially if you start to employ your own delivery drivers. 

A restaurant website is the first step toward providing the convenience of online ordering—something people require now, and will continue to appreciate when the option of dining at a restaurant becomes safe again. 

6. You decide how your brand is portrayed.

You don’t have to have a website for your restaurant to have an online presence. Your restaurant can be listed on Yelp and Google without ever launching your own website. So it may be tempting to just stick with those easy options—customers can find you there, and you can save the time and cost it takes to build a website, right?

The problem is that you don’t have control over how you show up on those spaces. You’re limited in what information you can include. You’re not able to put forth the version of your brand you want people to encounter.

When you create your own restaurant website, the space belongs entirely to you. You choose the color scheme so it matches your overall branding. You talk about your restaurant in the terms you know matter most to your customers. And you can load the best photos of the food your customers love. Your website is where you can put your best online face forward for the world, and make the case to customers for why they should choose you.

7. You give people a heads up about your restaurant hours.

Have you ever made the trip to a restaurant you were looking forward to, only to find it closed? You were probably already hungry and had to figure out an alternative option in a rush—not a fun experience. With COVID-19 wreaking havoc on any regularity that once existed in restaurant schedules, the risk of this experience has increased. 

You don’t want to disappoint customers that are already stressed out. A website is the best way to keep up-to-date information about your hours and what types of service you’re offering all in a central location. 

If dine-in service isn’t available and customers need to put in an order online for pickup, you want to provide clear instructions where they know to look. If you’ll be open on a different schedule than usual, you want to give them a head’s up before they get their hopes up for a lunch they can’t have. 

restaurant website with modified hours

8. You can share safety procedures.

Your location, your menu, and your food photography are all contributing factors in deciding whether to choose your restaurant. But in the age of COVID-19, another big thing consumers are looking for is information on how you’re working to keep customers and employees safe. 

A restaurant website gives you a chance to communicate to your audience that you’re taking concerns about the virus seriously, and that you’re thoughtfully implementing procedures to reduce risk as much as possible. As the restaurant owner, it also gives you a place to clearly outline any rules you expect customers to follow to keep others safe, such as wearing a mask or staying in their car for pickups and letting you bring orders to them. 

Even if people love your food, if they’re scared you’re not taking proper precautions to keep them safe, they won’t have anything to do with your business. And if conscious consumers feel like you’re needlessly putting employees at risk, you’ll lose their business for the long term as well. Show people you care and are doing your due diligence to get this right. 

restaurant website with covid-19 information

9. You can add income streams.

A restaurant site will mostly exist to promote your food, but you don’t have to stop there. Any restaurant website with ecommerce functionality can be used to sell other items as well. You can promote gift cards on your website, and sell branded merchandise like t-shirts, mugs, and stickers. 

You could even sell kits of everything a customer needs to make some of the items on your menu themselves. In some locales, cocktail kits have been a popular option (but you have to make sure that’s a legal option in your city before you go that route). That can be a good way to give people a taste of the experience they’d get dining in, even when it’s not an option.

restaurant website with to-go menu for covid-19

10.  You can enable and highlight customer reviews.

A lot of restaurants like to claim they offer the best pizza, tacos, or BBQ in their city, but most customers can see right through those claims—unless they’re backed up by customer reviews. If you allow customer reviews on your website and person after person talks up how delicious your pasta dishes or enchiladas are, every website visitor will see and pay attention. 

Positive reviews are powerful. For restaurants, they’re one of the best tools you have to prove to people that you’re worth trying out. The first step to getting good reviews is making amazing cuisine. Presumably, you’ve already got that part down. The next step is making it as easy as possible for customers to share what they think about your food on your beautiful website, or on other popular review sites like Google and Yelp.

Once you’ve gotten raves from happy customers, you can highlight their words on your website where any new customers interested in giving you a try can see them. Hearing how much your other customers love your cuisine will help anyone on the fence go ahead and make that order. 

Build Your Restaurant Website Today

In the best of times, running a restaurant successfully is hard. We’re clearly not in the best of times, and probably won’t be for a while. One of the most important things you can do right now to stay afloat is make sure you have an intuitive, useful, attractive restaurant website. 

If restaurant website design sounds intimidating, don’t let it be. Building a website today is easier than it’s ever been. You can use an intuitive website builder that comes with pre-designed templates and offers drag-and-drop functionality that anyone can figure out. Yes, even you as a restaurant owner can master website design with our easy to use templates. You can get a basic website up in a matter of hours, and make your food more accessible to customers in the process. 

Find the post on the HostGator Blog


source https://www.hostgator.com/blog/importance-websites-restaurants/

Fonts and Colors for the Retail, Healthcare, and Financial Industries

Have you ever realized how colors and fonts influence our lives in a positive or negative way? While sitting at a restaurant, have you ever ...